Edit picture
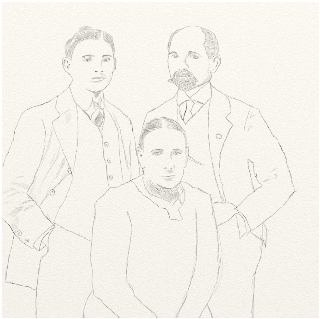
A picture often shows more than one person. To mark the current person in the picture, first open the editing area for the pictures using the symbol at the bottom right in the picture area. Here the relevant picture must first be selected and clicked on. Now only the current picture can be seen. The possible actions can be found below in the form of buttons.
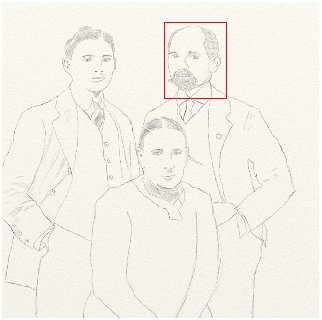
The button "Define frame" opens the picture in a larger view. Click and drag with the mouse to get a red frame. If you are not satisfied click and drag again. Once you are satisfied click on the button "save". The frame will be stored and the previous view becomes visible with the new frame. You can redefine the frame again with the button "Define frame".
To remove an existing frame click on the button "Delete frame".
Are more of the persons in the picture stored in the database, you can link the picture to them. To do so, click on the button "link image". After that you will see the search view. You now can search for an other person in the picture. Clicking on a result entry will link the image to that person and opens the new persons image editing view. So you can define a frame for this person as well.
To continue work on the previous person you have to navigate to this persons detail view again. To do so cancel picture editing with the button "cancel" and choose the currently linked picture. Now click on the picture to show the Picture overview. From there click on the previous edited person and the Detail view of that person will show.
To remove a picture you also open the menu "Edit -> Pictures" and choose the requested picture. A click on the button "delete" will delete the picture after a security question.
Hint: If the picture is linked to other persons, only the link to the current person will be deleted. The picture and the links to all other persons will stay untouched.
One picture for each person can be marked as "portrait". A portrait can be recognized in the editing view of the images by the symbol at the bottom left in the corresponding image. This picture will then be used in the Detail view and in the tree view with pictures. If no picture is marked as portrait a pictogram is used in the tree view with pictures. To mark a picture as "portrait" go to the edit mode for the pictures and choose the relevant picture. The button "portrait" will then mark this picture. In the carousel view the "portrait" will always be shown in the almost left position.
If a picture was accidently marked as portrait this mark can be deleted by pressing the button "no Portrait". Alternatively choose an other picture as portrait.
A rear view can be captured for each image. This often contains notes from contemporary witnesses on the people depicted on the front. This is also done via the editing view of the images. The first thing to do here is to select the image to which a reverse side should be added. After clicking the "Add back side" button, a dialog opens into which a new image can be dragged. If a picture has a back, this is indicated in the processing overview with the symbol at the bottom right of the corresponding picture.
For every picture you can add a comment to describe the shown scene. Therefore choose the picture in the edit picture carousel and choose "Edit comment". Now you can enter or change the comment of the picture.